Ribbon Customization
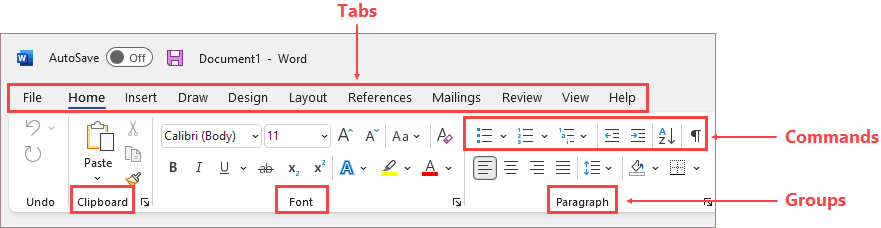
Customizing the Microsoft Excel Ribbon allows you to organize commands, tabs, and groups to align with your personal workflow. While you can reorder and add custom features, customizations apply only to the specific Office application you are editing.
Video Explanation
Customization Capabilities
| Category | Description / Scope |
|---|---|
| Allowed | Add custom tabs, insert custom groups, change default tab order, hide unused tabs, and export your setup. |
| Not Allowed | Reduce the visual size of the ribbon, font, or command icons (adjustable only via system resolution settings). |
| Scope | App-specific; settings in Excel do not automatically transfer to Word or PowerPoint. |
tip
Microsoft 365 subscribers can save and sync ribbon settings across devices by signing into the same Microsoft account.
Visibility & Display Modes
Toggle your ribbon workspace using built-in display options:
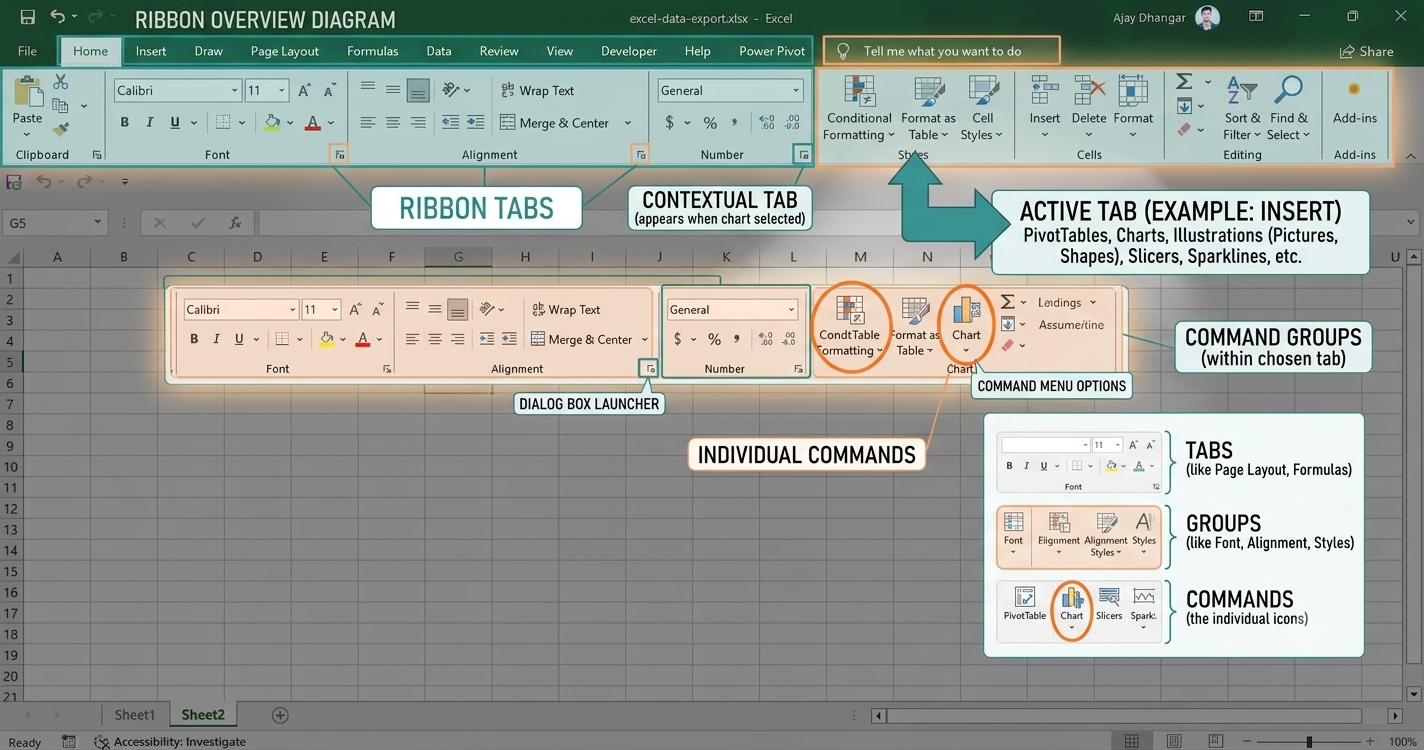
- Expand / Collapse Ribbon: Press
Ctrl + F1, double-click any ribbon tab, or right-click a tab and select Collapse the Ribbon. - Full-Screen Restoration: Click More (
...) at the top right to temporarily view controls, then choose a permanent layout under Ribbon Display Options.
Managing Ribbon Tabs
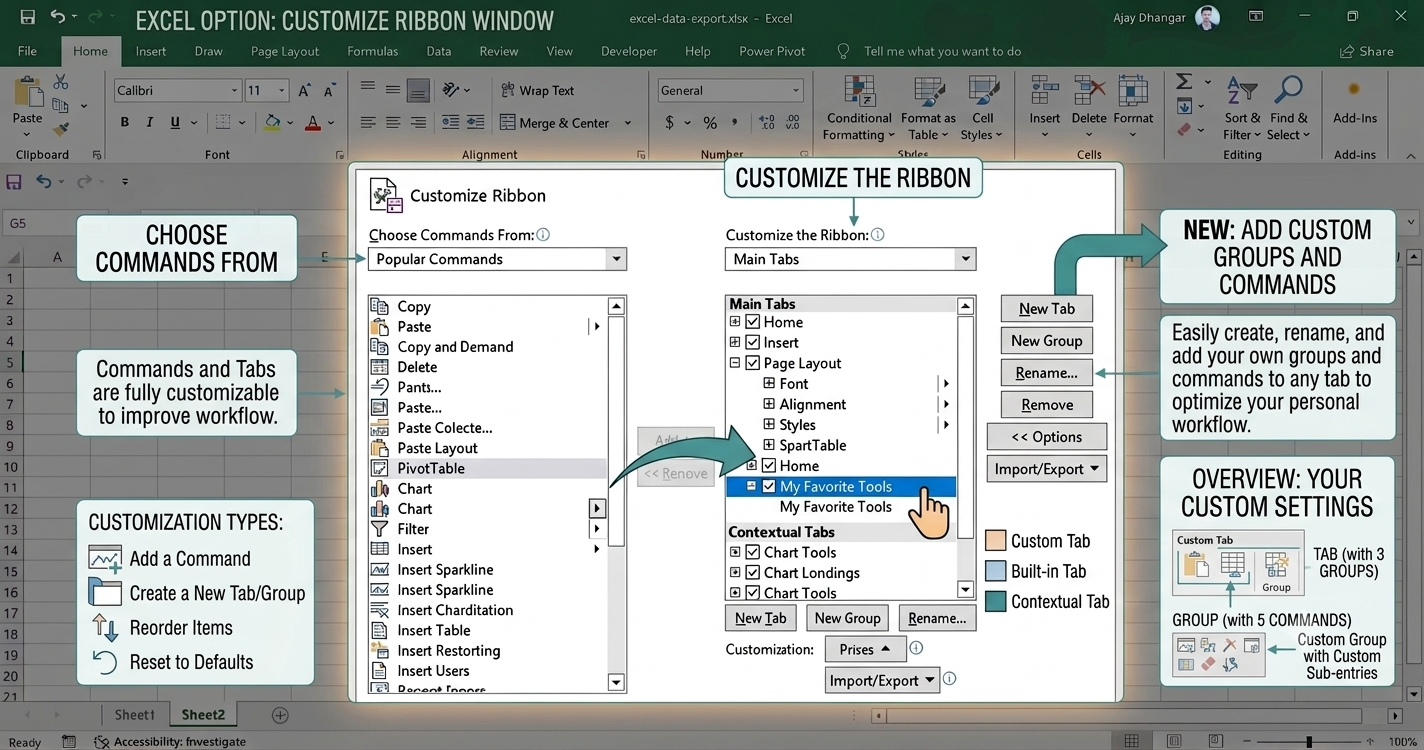
Access settings by right-clicking any empty ribbon area and selecting Customize the Ribbon.
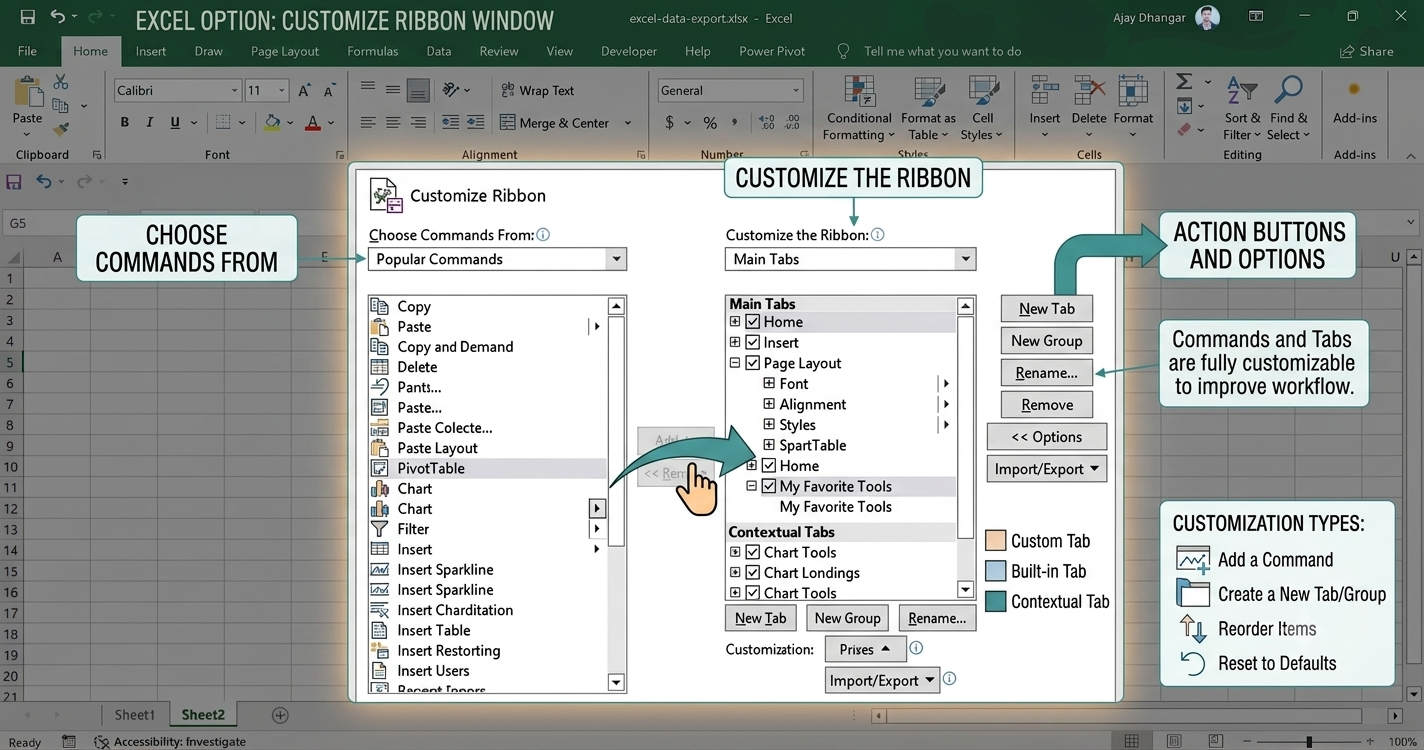
- Add Custom Tab: Click New Tab in the configuration window to generate a new tab with an initial custom group.
- Reorder Tabs: Select a tab in the right-hand panel and click Move Up or Move Down (Note: The File tab cannot be moved).
- Hide or Remove Tabs: Uncheck any tab to hide it. Select a custom tab and click Remove to delete it permanently.
Customizing Groups & Commands
Commands can only be added to custom groups; default built-in groups cannot have native icons removed or renamed directly.
| Action | Procedure |
|---|---|
| Add Custom Group | Select target tab → New Group → Rename to assign a label and display icon. |
| Add Commands | Select custom group → Choose source under Choose commands from → Highlight tool → Add. |
| Replace Default Group | Add a New Group to the tab → Add commands from Main Tabs → Select original default group → Remove. |
| Hide Command Labels | Right-click the custom group → Select Hide Command Labels. |
Resetting & Sharing Customizations
Restore original layouts or transfer your setup to another computer:
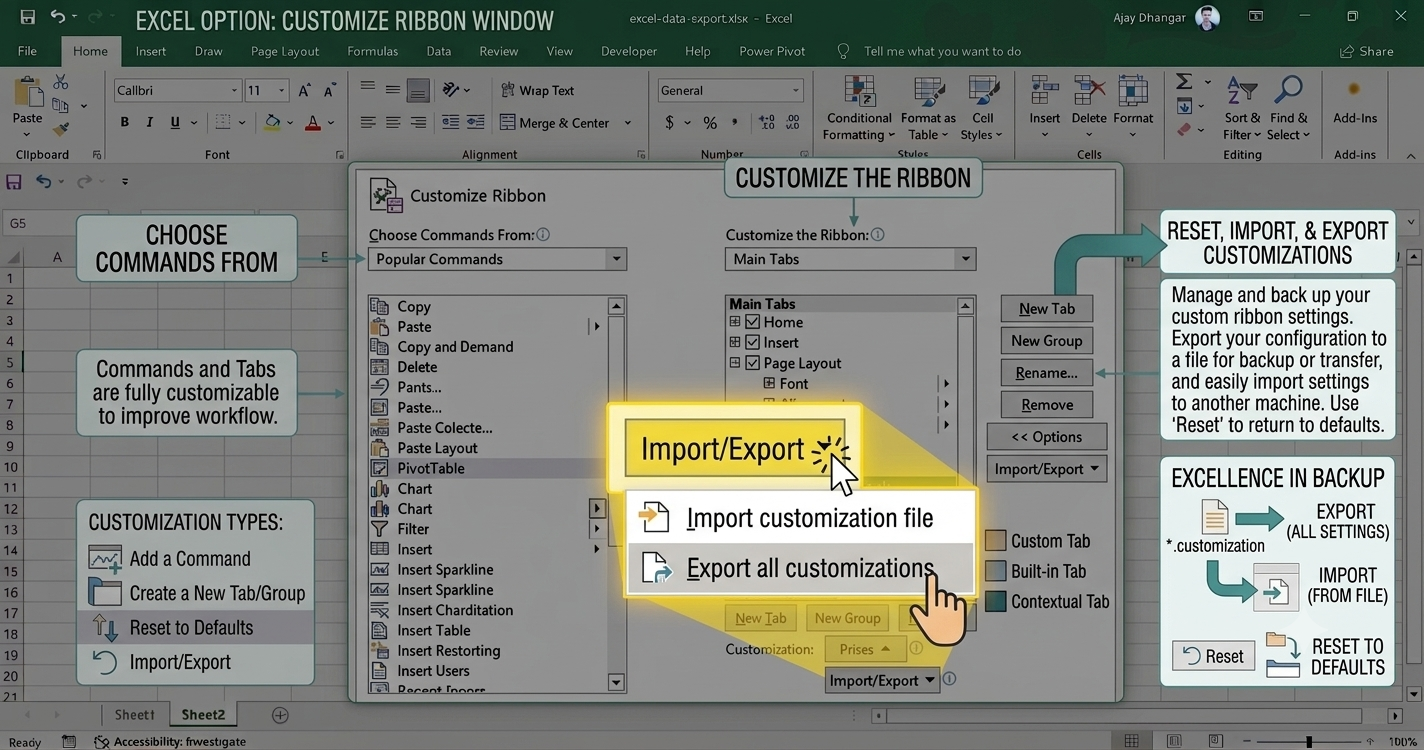
- Reset Single Tab: Select a modified default tab → Click Reset → Reset only selected Ribbon tab.
- Reset Entire Ribbon: Click Reset → Reset all customizations (Warning: Clears Quick Access Toolbar settings).
- Export Customizations: Click Import/Export → Export all customizations to generate a backup file.
- Import Customizations: Click Import/Export → Import customization file (Note: Overwrites current ribbon and QAT setups).