

Google Summer of Code 2026: Complete Registration Guide to L...
Master the GSoC 2026 application process. Learn how to choose organizations, write proposals, and earn a stipend of up t...

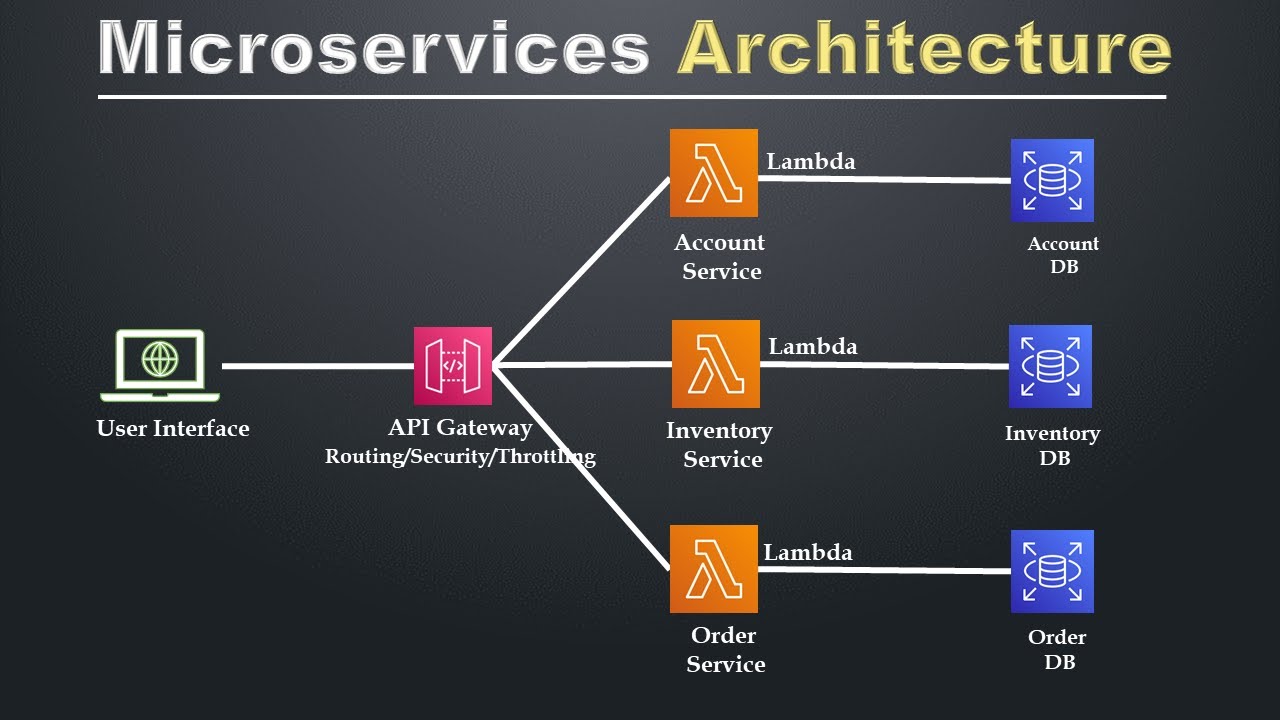
Microservices Architecture
Microservices architecture is an approach to designing software systems where the application is broken down into smalle...

Introduction to WebAssembly
WebAssembly (Wasm) is a binary instruction format that provides near-native performance for web applications. Designed a...
Cryptography and Its Use in Cyber Security
In the realm of cyber security, cryptography stands as a critical tool for protecting information. As digital data excha...
Comprehensive Documentation on Linux Development and Cyberse...
Linux, renowned for its stability, security, and open-source nature, plays a pivotal role in modern computing environmen...
React JS
React is a JavaScript library primarily used for building user interfaces in single-page applications. While it's often ...